The eight steps, start to finish
Etching reads like photography for metal. You shine a pattern onto a light-sensitive coating, wash away what you don't need, and the chemistry does the cutting. Here is the run a sheet goes through on our lines:
| Step | What happens | Machine |
|---|---|---|
| 1. Artwork & film | Your CAD drawing becomes a 1:1 photo-tool (film), one for each side on a two-sided part. | Pre-press |
| 2. Clean & degrease | The sheet is scrubbed and degreased so the resist bonds. Skip this and everything downstream suffers. | Cleaning / brushing |
| 3. Coat with resist | A dry film is laminated on, or liquid resist is coated, over both faces. | Resist coating machine |
| 4. Expose | UV light through the film hardens the resist where you want metal to stay. | Exposure machine |
| 5. Develop | The unhardened resist washes off, baring the metal that is about to go. | Developing machine |
| 6. Etch | Etchant is sprayed top and bottom; it dissolves the bare metal and leaves the masked pattern. | Etching machine |
| 7. Strip | The hardened resist is stripped away, leaving clean, finished metal. | Stripping machine |
| 8. Rinse, dry, finish | Wash off the chemistry, dry, then plate, form or colour if the part calls for it. | Drying / finishing |
What actually dissolves the metal
The etchant is the part that does the work. For most jobs that is ferric chloride (FeCl₃), which handles stainless steel, copper, brass and nickel without much fuss. High-volume copper and PCB shops often switch to cupric chloride (CuCl₂) because it can be regenerated on the fly and holds a steadier etch rate, so the line keeps running and there is less spent liquid to deal with. Aluminium is a different animal — usually an alkaline etchant — and titanium needs a hydrofluoric mix and proper handling. We pick the chemistry around your metal, not the other way round; there is a fuller breakdown in our ferric vs cupric chloride guide.
One detail that catches people out: etching is sprayed, not dunked. Fresh etchant hits the surface and the spent liquid drains straight off, which keeps the etch even and the walls reasonably square. It also eats sideways a little under the resist — that's undercut, and it's why very fine features get harder as the metal gets thicker. How tight you can hold things is covered in how precise is photochemical etching.
Rule of thumb on the floor: the etch goes down and out at roughly the same rate, so the thinner the metal, the finer the detail you can hold.
Why etch instead of stamp or laser-cut
People come to etching for a few reasons that are hard to get any other way:
- No tooling. A change to the design is a change to a film, not a new hard die. Prototypes and production use the same setup.
- Flat and stress-free. Nothing is sheared, bent or heated, so there are no burrs, no work-hardened edges and no heat-affected zone.
- Complexity is free. A part with 2,000 tiny holes etches in the same pass as a plain blank. The artwork carries the detail, not the tool.
- Thin material stays flat. Foils down to about 0.02 mm come through without distorting — the reason etching owns the market for SMT stencils, meshes and lead frames.
Where it stops making sense is thick plate or very large simple cuts; past roughly 2 mm the economics usually tip toward other methods. If you're weighing the spend, the etching machine cost guide breaks down what drives the number.
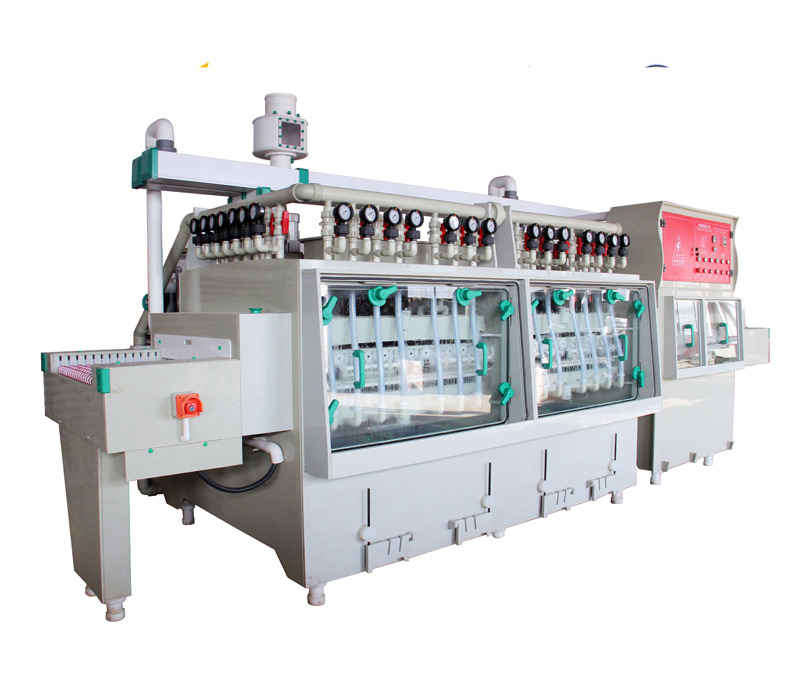
What a full etching line looks like
You don't have to buy the whole line at once — plenty of customers start with a single etching machine and add stations as volume grows. A complete photochemical line strings the eight steps together: cleaning, coating, exposure, developing, etching, stripping and surface finishing. We size each station to one throughput so nothing becomes a bottleneck, from a benchtop laboratory set-up to 1500×3000 mm huge-plate and reel-to-reel lines. See the full range on the machines page.
Common questions
Practically, yes. Photochemical etching (PCM, also called photo etching or chemical milling) is the version that uses a photo-imaged resist to define the pattern before the etchant removes the bare metal. People use the terms interchangeably — the core idea is to mask the metal you keep and dissolve the rest.
Most often ferric chloride (FeCl₃) for stainless steel, copper, brass and nickel. High-volume copper and PCB work often uses cupric chloride (CuCl₂) because it regenerates and holds a steady etch rate. Aluminium usually takes an alkaline or acid etchant; titanium needs a specialist hydrofluoric mix.
The etch step itself is usually a few minutes and depends on the metal and its thickness — thin foil clears in under a minute, a 1 mm stainless sheet takes longer. The full run including coating, exposure, developing and stripping is typically well under an hour per sheet.
No. The metal is dissolved rather than sheared or cut, so parts come out flat, burr-free and without work-hardened edges or a heat-affected zone. That is a big reason people choose etching for thin, precise parts.